Aws doc
Step by step on how to setup Instance
- Registering a new user. (full guide you can find here )
- In the end of registration choose Basic Support Plan
- Going to Console
- Sing in using root user email

- Log in

- Going to dashboard
- Going to EC2

- Going to the Instance dashboard and tap Launch Instance

- Launch Instance settings
- Enter name of your instance

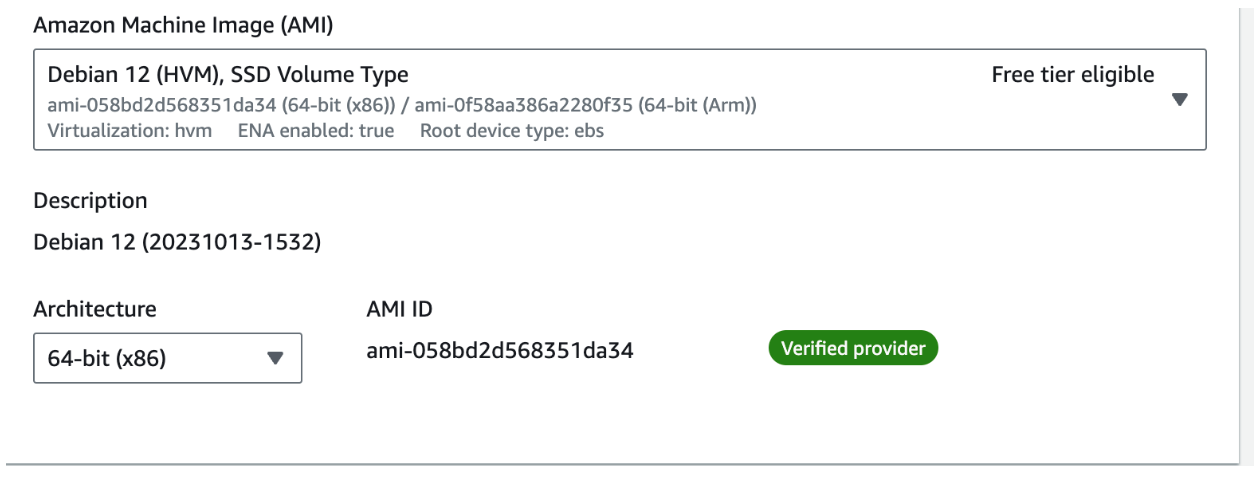
- Choose Debian OS

- AMI and Architecture default
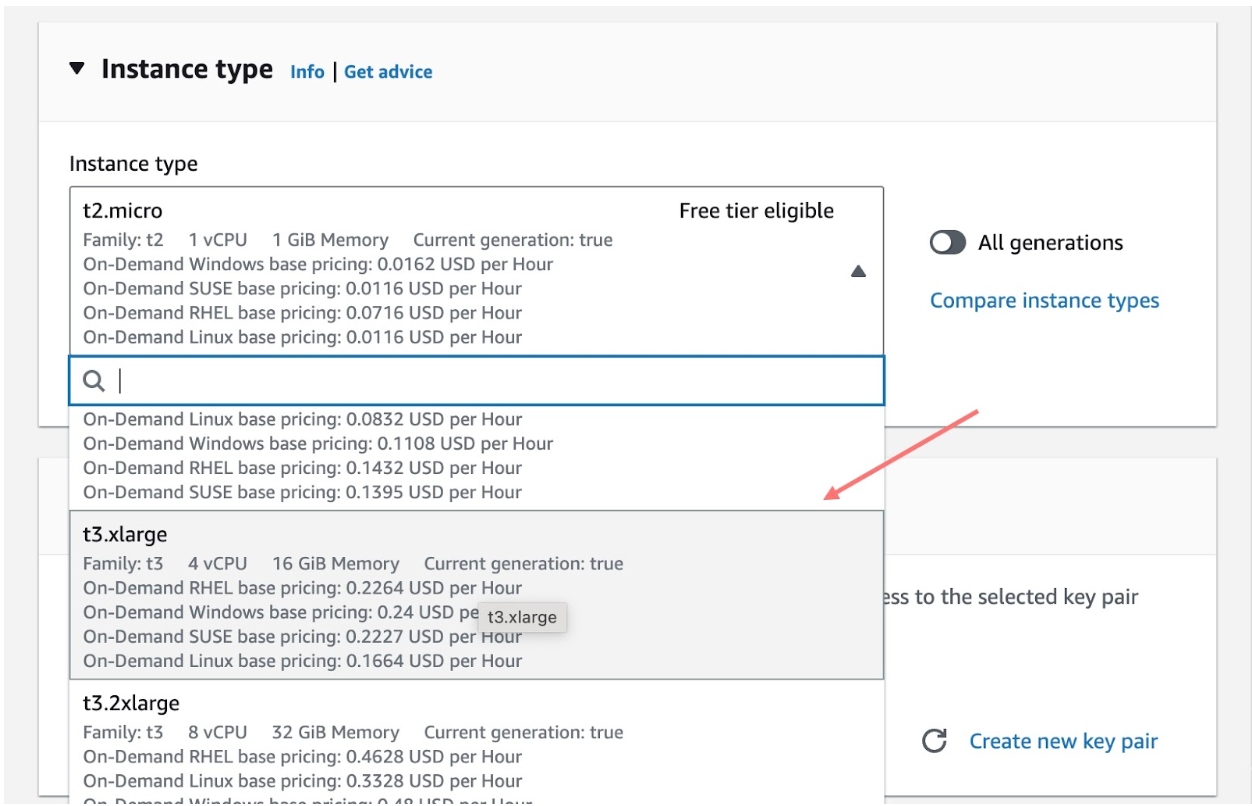
- Instance type
- Key pair. Choose your SSH key. (If you don’t have any pairs - you must to create and connect. See manual below)

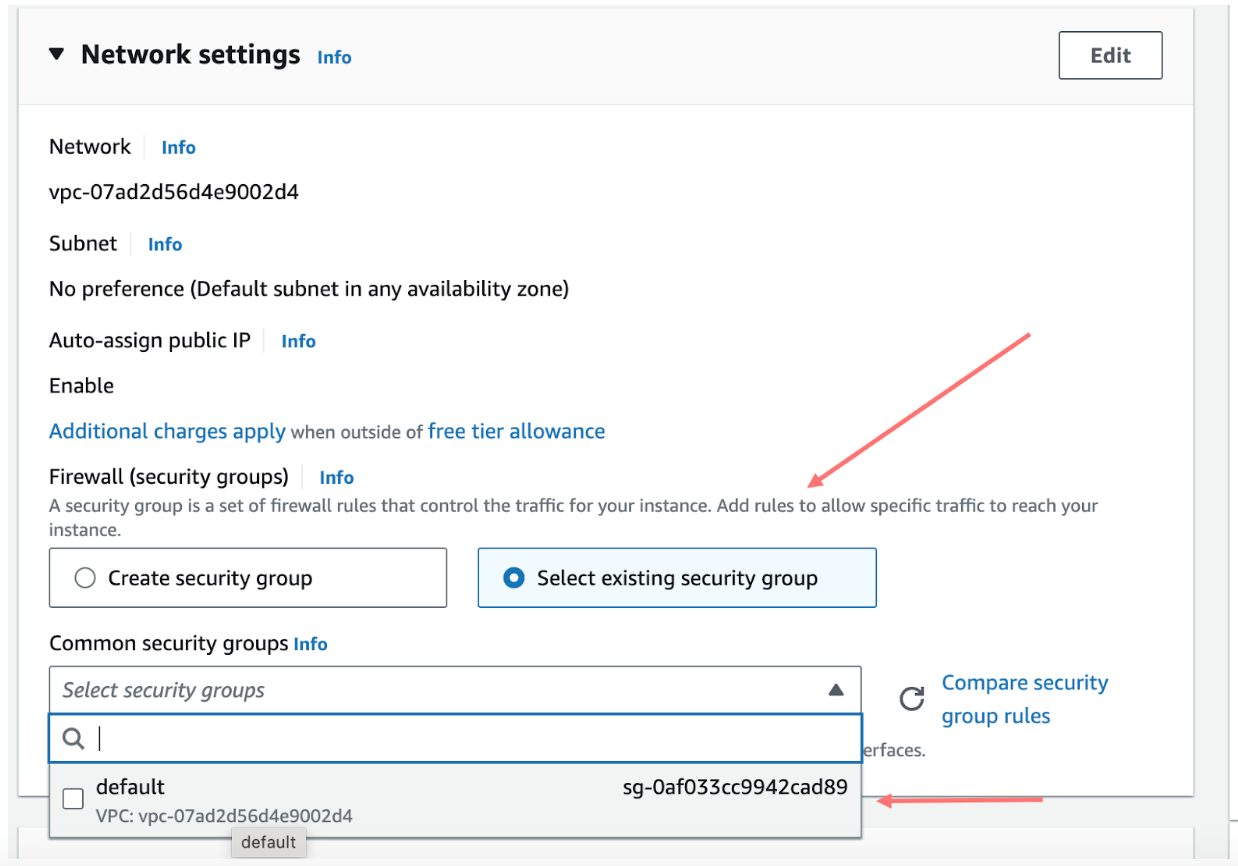
- Network Settings. Choose Select Existing Security Group. Choose the default security group from the dropdown.
- Configure Storage. Choose 1024GB and gp3.

-
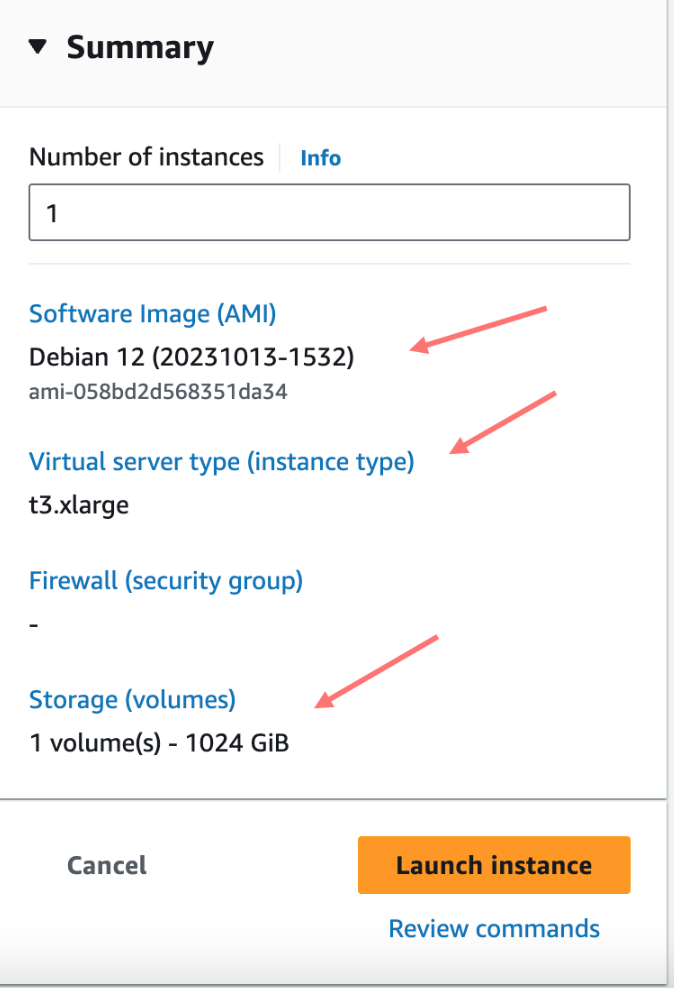
Check the chosed settings in the right tab and press Launch Instance
-
See the new instance in the dashboard. Check the chosed settings in the right tab and press Launch Instance

How to Pair SSH Key
- Go to the left bar navigation - Key Pairs

- Actions - Import Key Pairs

- Enter the Name of your SSH Key and paste the key into the field. (Or add the key file)

Connect SSH Key to Instance
- Going to Your instance dashboard. Click Connect

- Copy directions and go to the Terminal

- Put in the Terminal: SSH and link from the Connect Instance Dashboard.

- Press Enter. Confirm with passphrase.
- SSH key successfull connected.
Docker Setup
- Use manual for debian
- Going to Terminal and put the SSH + Direction from Instance Connect.
- Enter the passphrase. Confirm
- Add Docker's official GPG key (from manual)
- Add the repository to Apt sources
- Install the Docker Packages. To install the latest version, run: take code from manual and put in terminal. Enter
- Give for the admin permission to use the Docker
- Press Q: put command: nano /etc/group
- Search in the group list: docker - add admin and press сtrl (cmd) + x. Press Enter
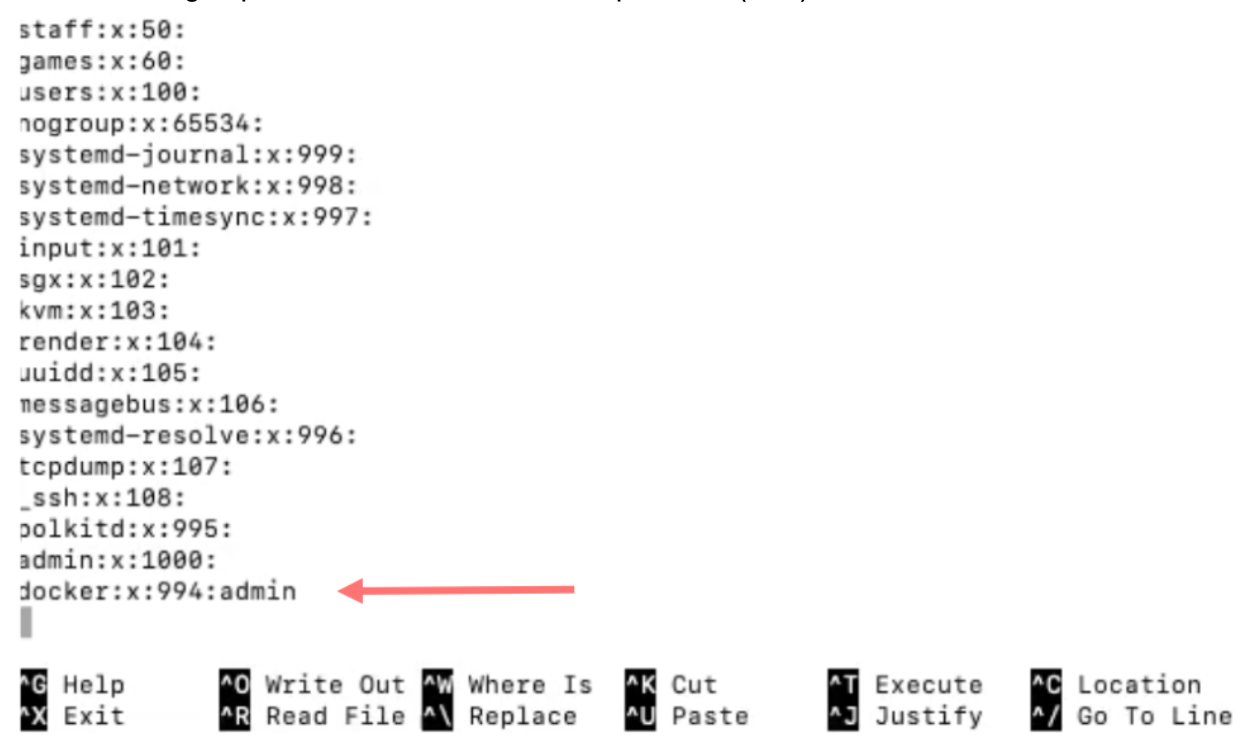
- Check availability, type - id admin. You must see the docker in the list

- Reload Terminal. Put SSH + Direction
- Type “docker ps”
- Docker completed
